Overview
When working with character assets in Unreal Engine, you might run into parts of a mesh—like accessories or body parts—that you don’t need. Or maybe some bones are just sitting there doing nothing. Instead of jumping into Blender or Maya to fix things, you can handle it all right inside Unreal Engine.
This post will walk you through how to remove skeletal mesh sections and bones using the built-in Skeletal Mesh Editor in UE5.
Environment
- Unreal Engine 5.6.0
- Windows 11 Pro
Prerequisite
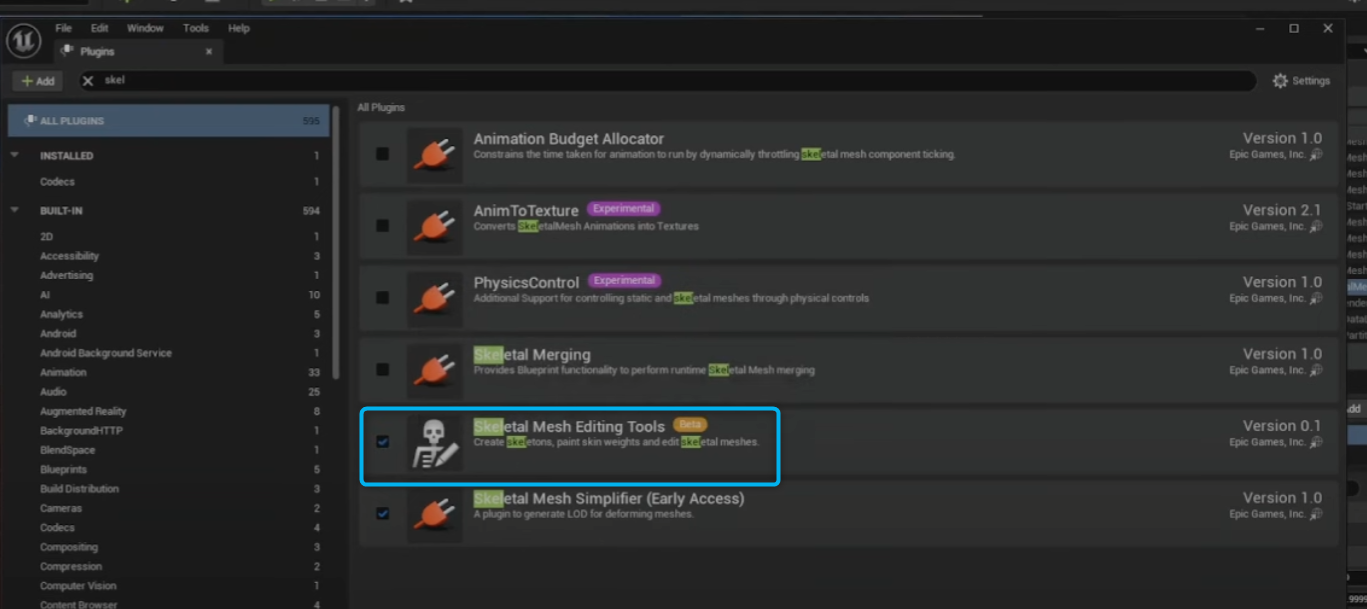
Make sure the Skeletal Mesh Editing Tool plugin is enabled
Go to:
Edit → Plugins → Search "Skeletal Mesh Editing Tool"
Enable it and restart the editor if needed.
 `
`
Main Content
Step 1: Open the Skeletal Mesh
- Open your skeletal mesh from the Content Browser.
- It will open up in the Skeletal Mesh Editor.
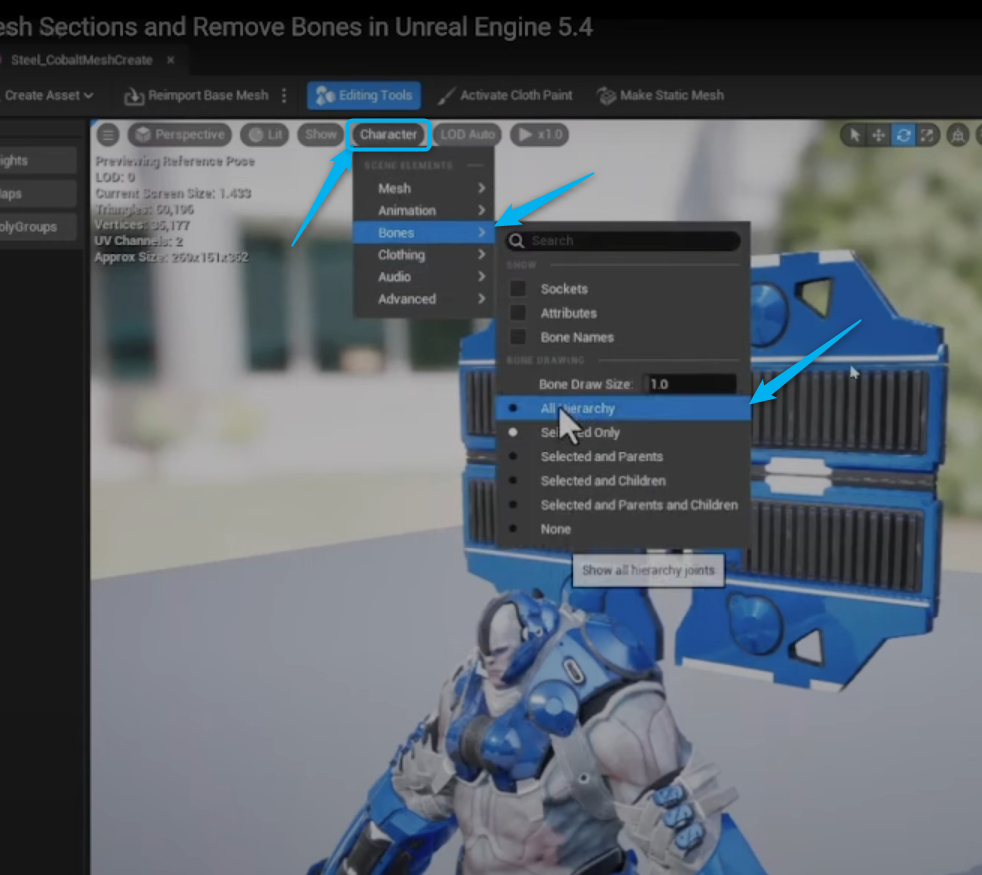
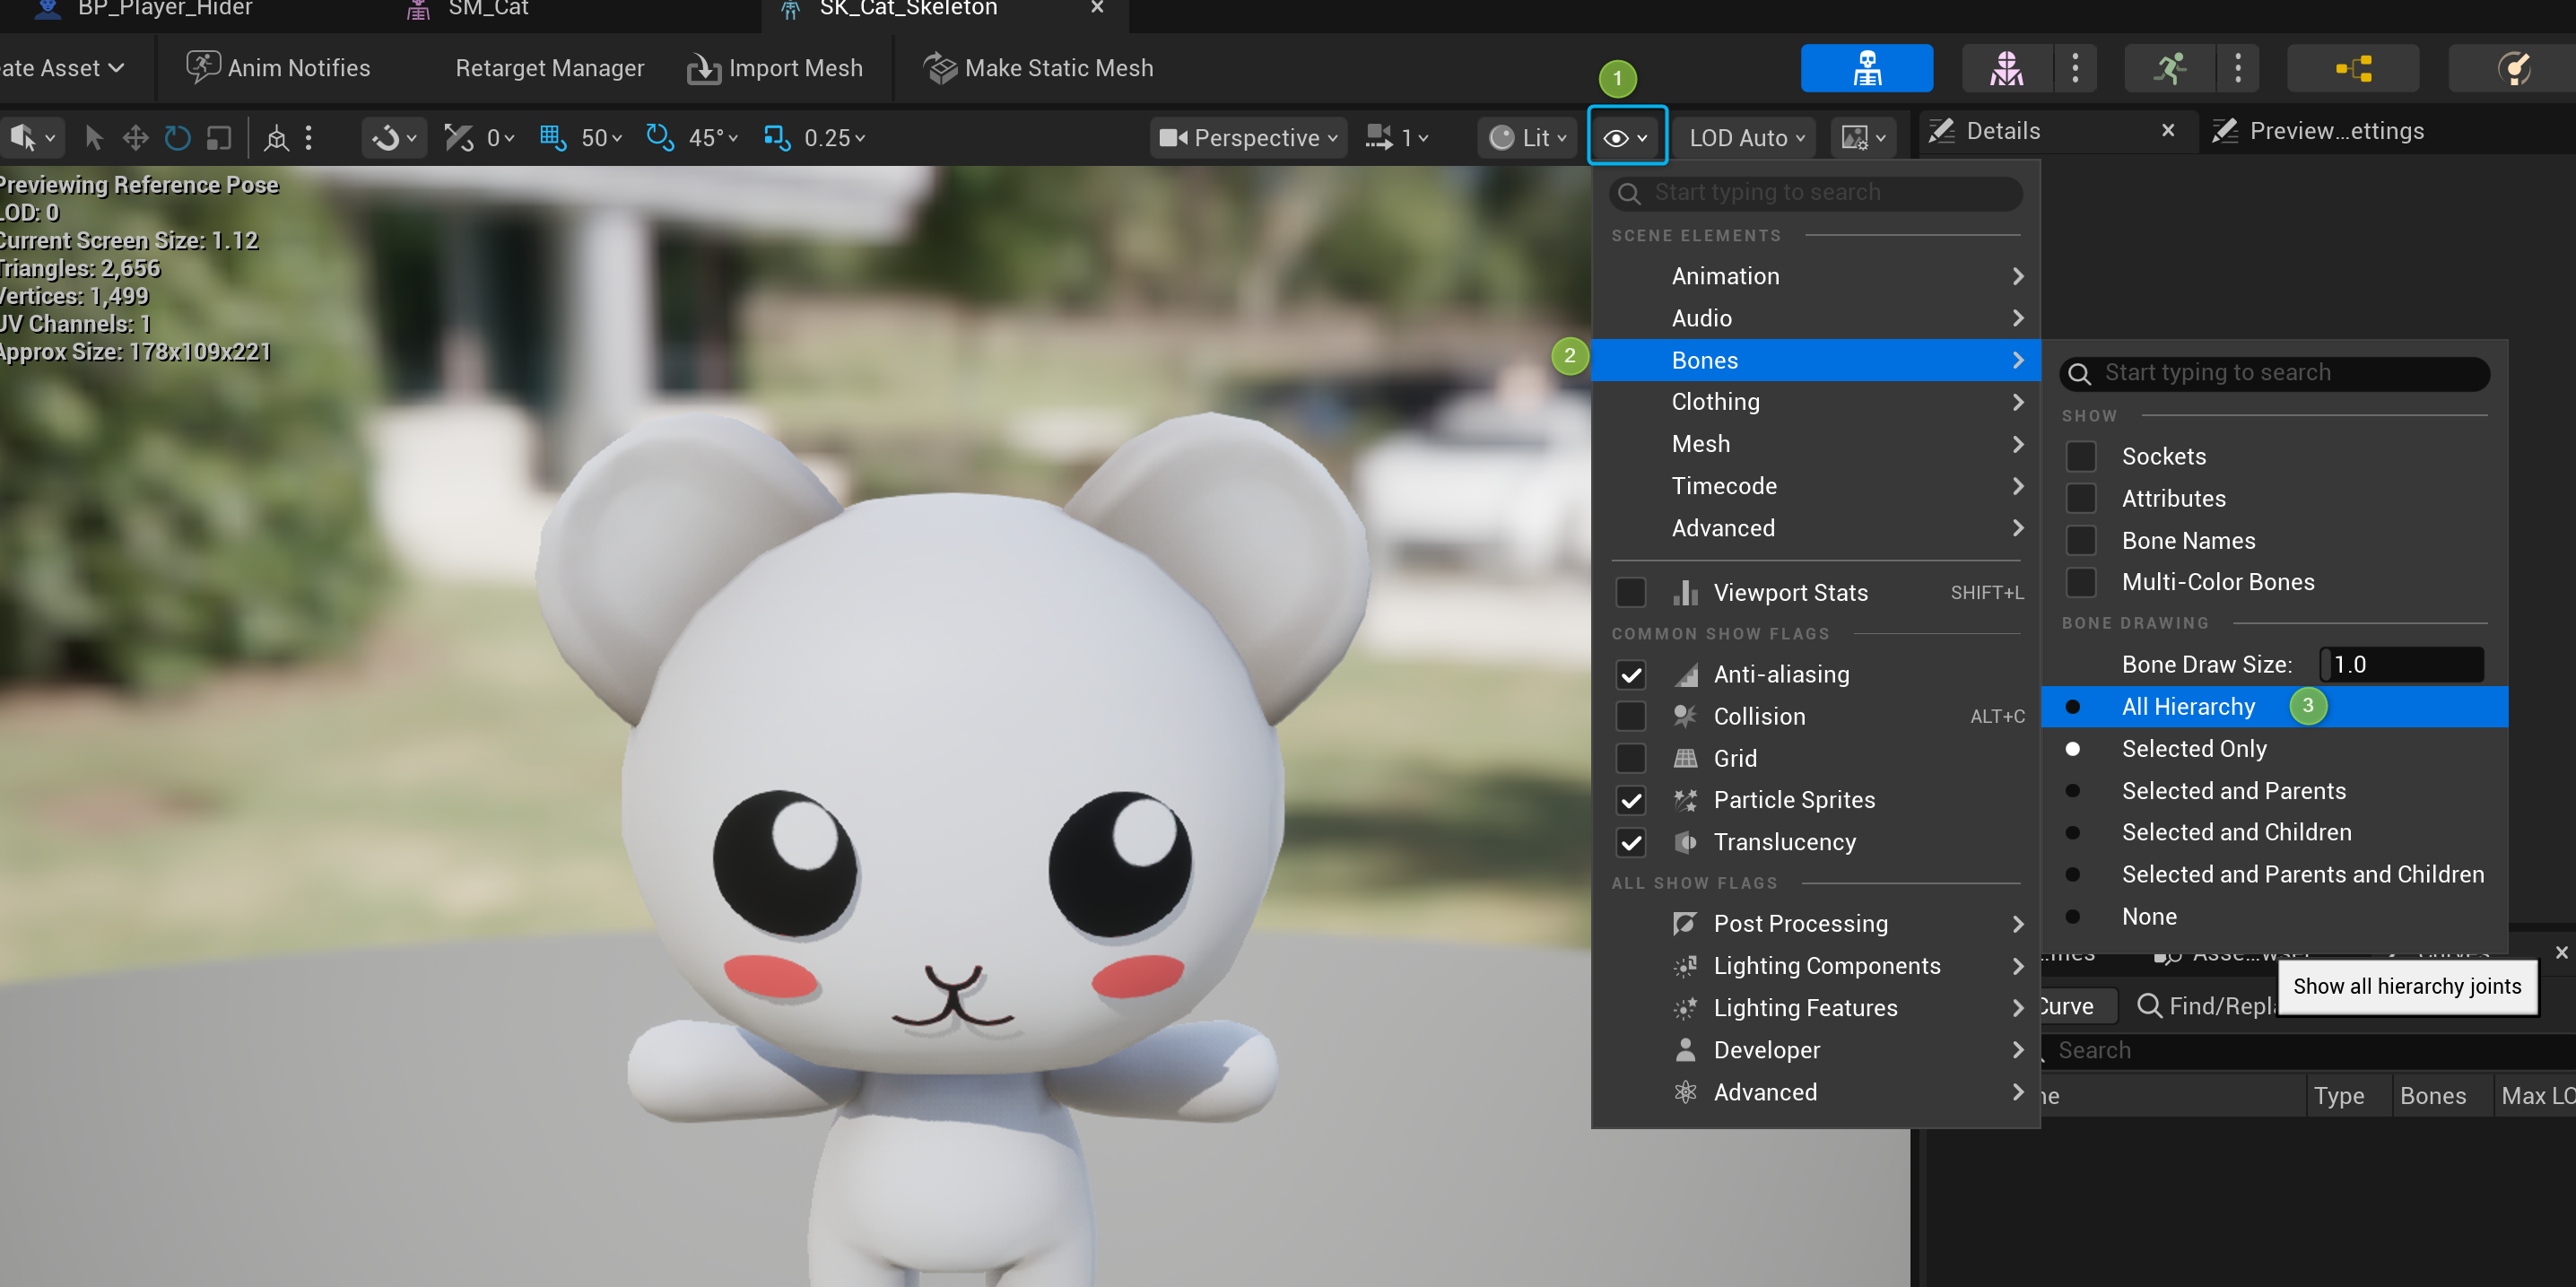
Step 2: Show Bones in the Viewport
If you're using UE5.0 to UE5.5:
Click Character → Bone → All Hierarchy
If you're using UE5.6 or later:
Click Eye Icon -> Bones -> All Hierarchy
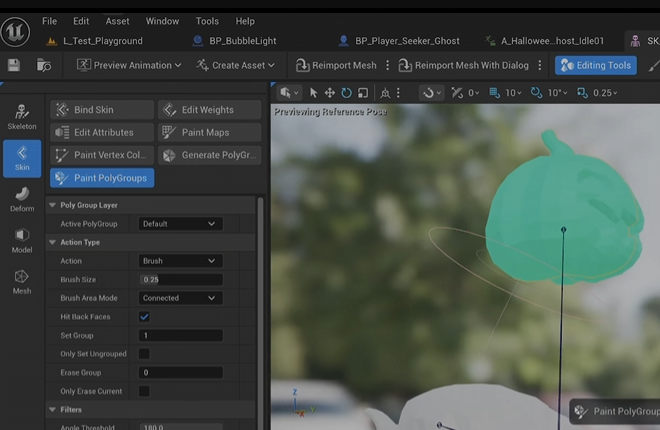
Step 3: Paint the Section You Want to Delete
Go to Skin → Paint PolyGroups, then paint over the mesh section you want to delete.
Once you're done painting, click Accept.
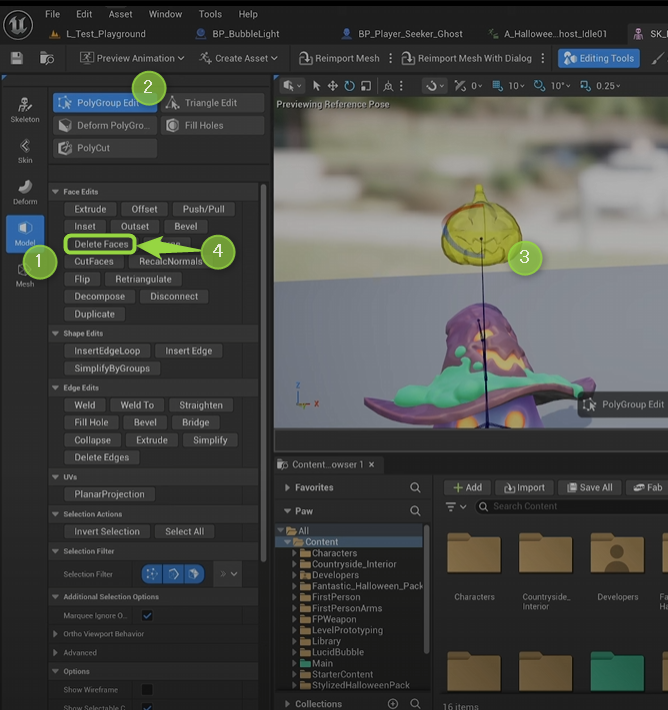
Step 4: Delete Faces
Go to Model → PolyGroup Edit, select the painted area, then click Delete Faces and Accept.
If you missed a spot, just repeat step 3 and 4.
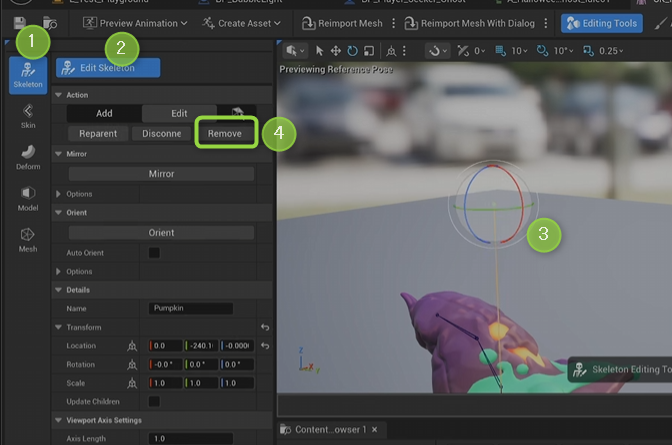
Step 5: Delete Bones
Go to Skeleton → Edit Skeleton, select the bone you want to remove, click Remove, then Accept.
Step 6: Save
Hit Save on your skeletal mesh asset. That’s it! done!
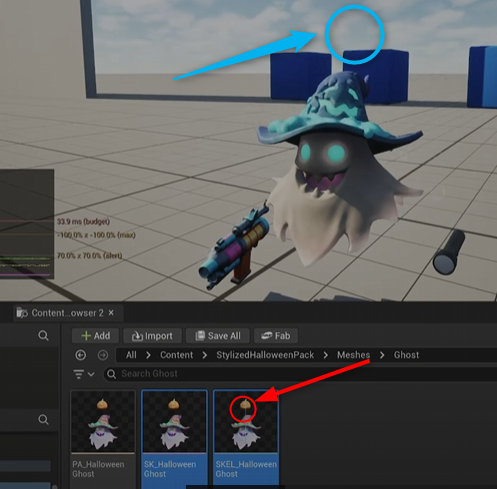
Result
I removed the pumpkin from my ghost skeleton—right inside Unreal. No Blender needed.